How to Upload a Json File in Qgis
This tutorial will provide step-past-step directions on how to visualize location information from The ScrapeHero Information Store using the open-source GIS software QGIS.
What is QGIS?
QGIS, previously known as Quantum GIS, is a free, open up-source Geographic Information System (GIS) software. It tin can be downloaded for free for Windows, Mac, Linux, BSD, and mobile devices (for downloading and installing instructions please click here ).
QGIS helps create, edit and visualize geospatial data. It too enables a wide range of different spatial data analyses using different tools and plugins available with QGIS (for more than QGIS tutorials, click hither ).
Location Data for Visualization
We will use one of the store location datasets from the ScrapeHero Data Store. For this tutorial, we will apply the complete list of Subway shop locations in the United States . This data contains each store's breadth and longitude coordinates, which you can plot as points over a map. Y'all can download a sample CSV file or buy the total data from the link below.
Subway store locations in the USA
Visualizing point data over the base map

The easiest way to understand the store location information better is to plot it as a map. When we plot locations on a 2D surface, the points' spatial relationships, such as their proximity to each other or aggregation, are easily understood. Furthermore, when we plot points higher up a base map, we can attain more than information nigh the information points past simple visual estimation. Yous can know in which city the stores are located, the nearby towns, roads, lakes or like geographical features adjacent to the shop, and many more.
The steps to place the point data over the base map of a region/country are:
- Import the base map
- Import the CSV file downloaded from the ScrapeHero store as a bespeak vector
- Edit the symbology and characterization accordingly
- Consign the map from QGIS to an image or a PDF
Here is a quick video on how to practise this if y'all are in a bustle
Import the base map
The Base map layer provides background details similar roads, points of interest (POI), edifice footprints, rivers, etc.
Nosotros will employ OpenStreetMaps (OSM) as our base map as it the default in QGIS. You lot can use many other similar base maps like Google Maps, Mapbox, Bing Maps, etc.
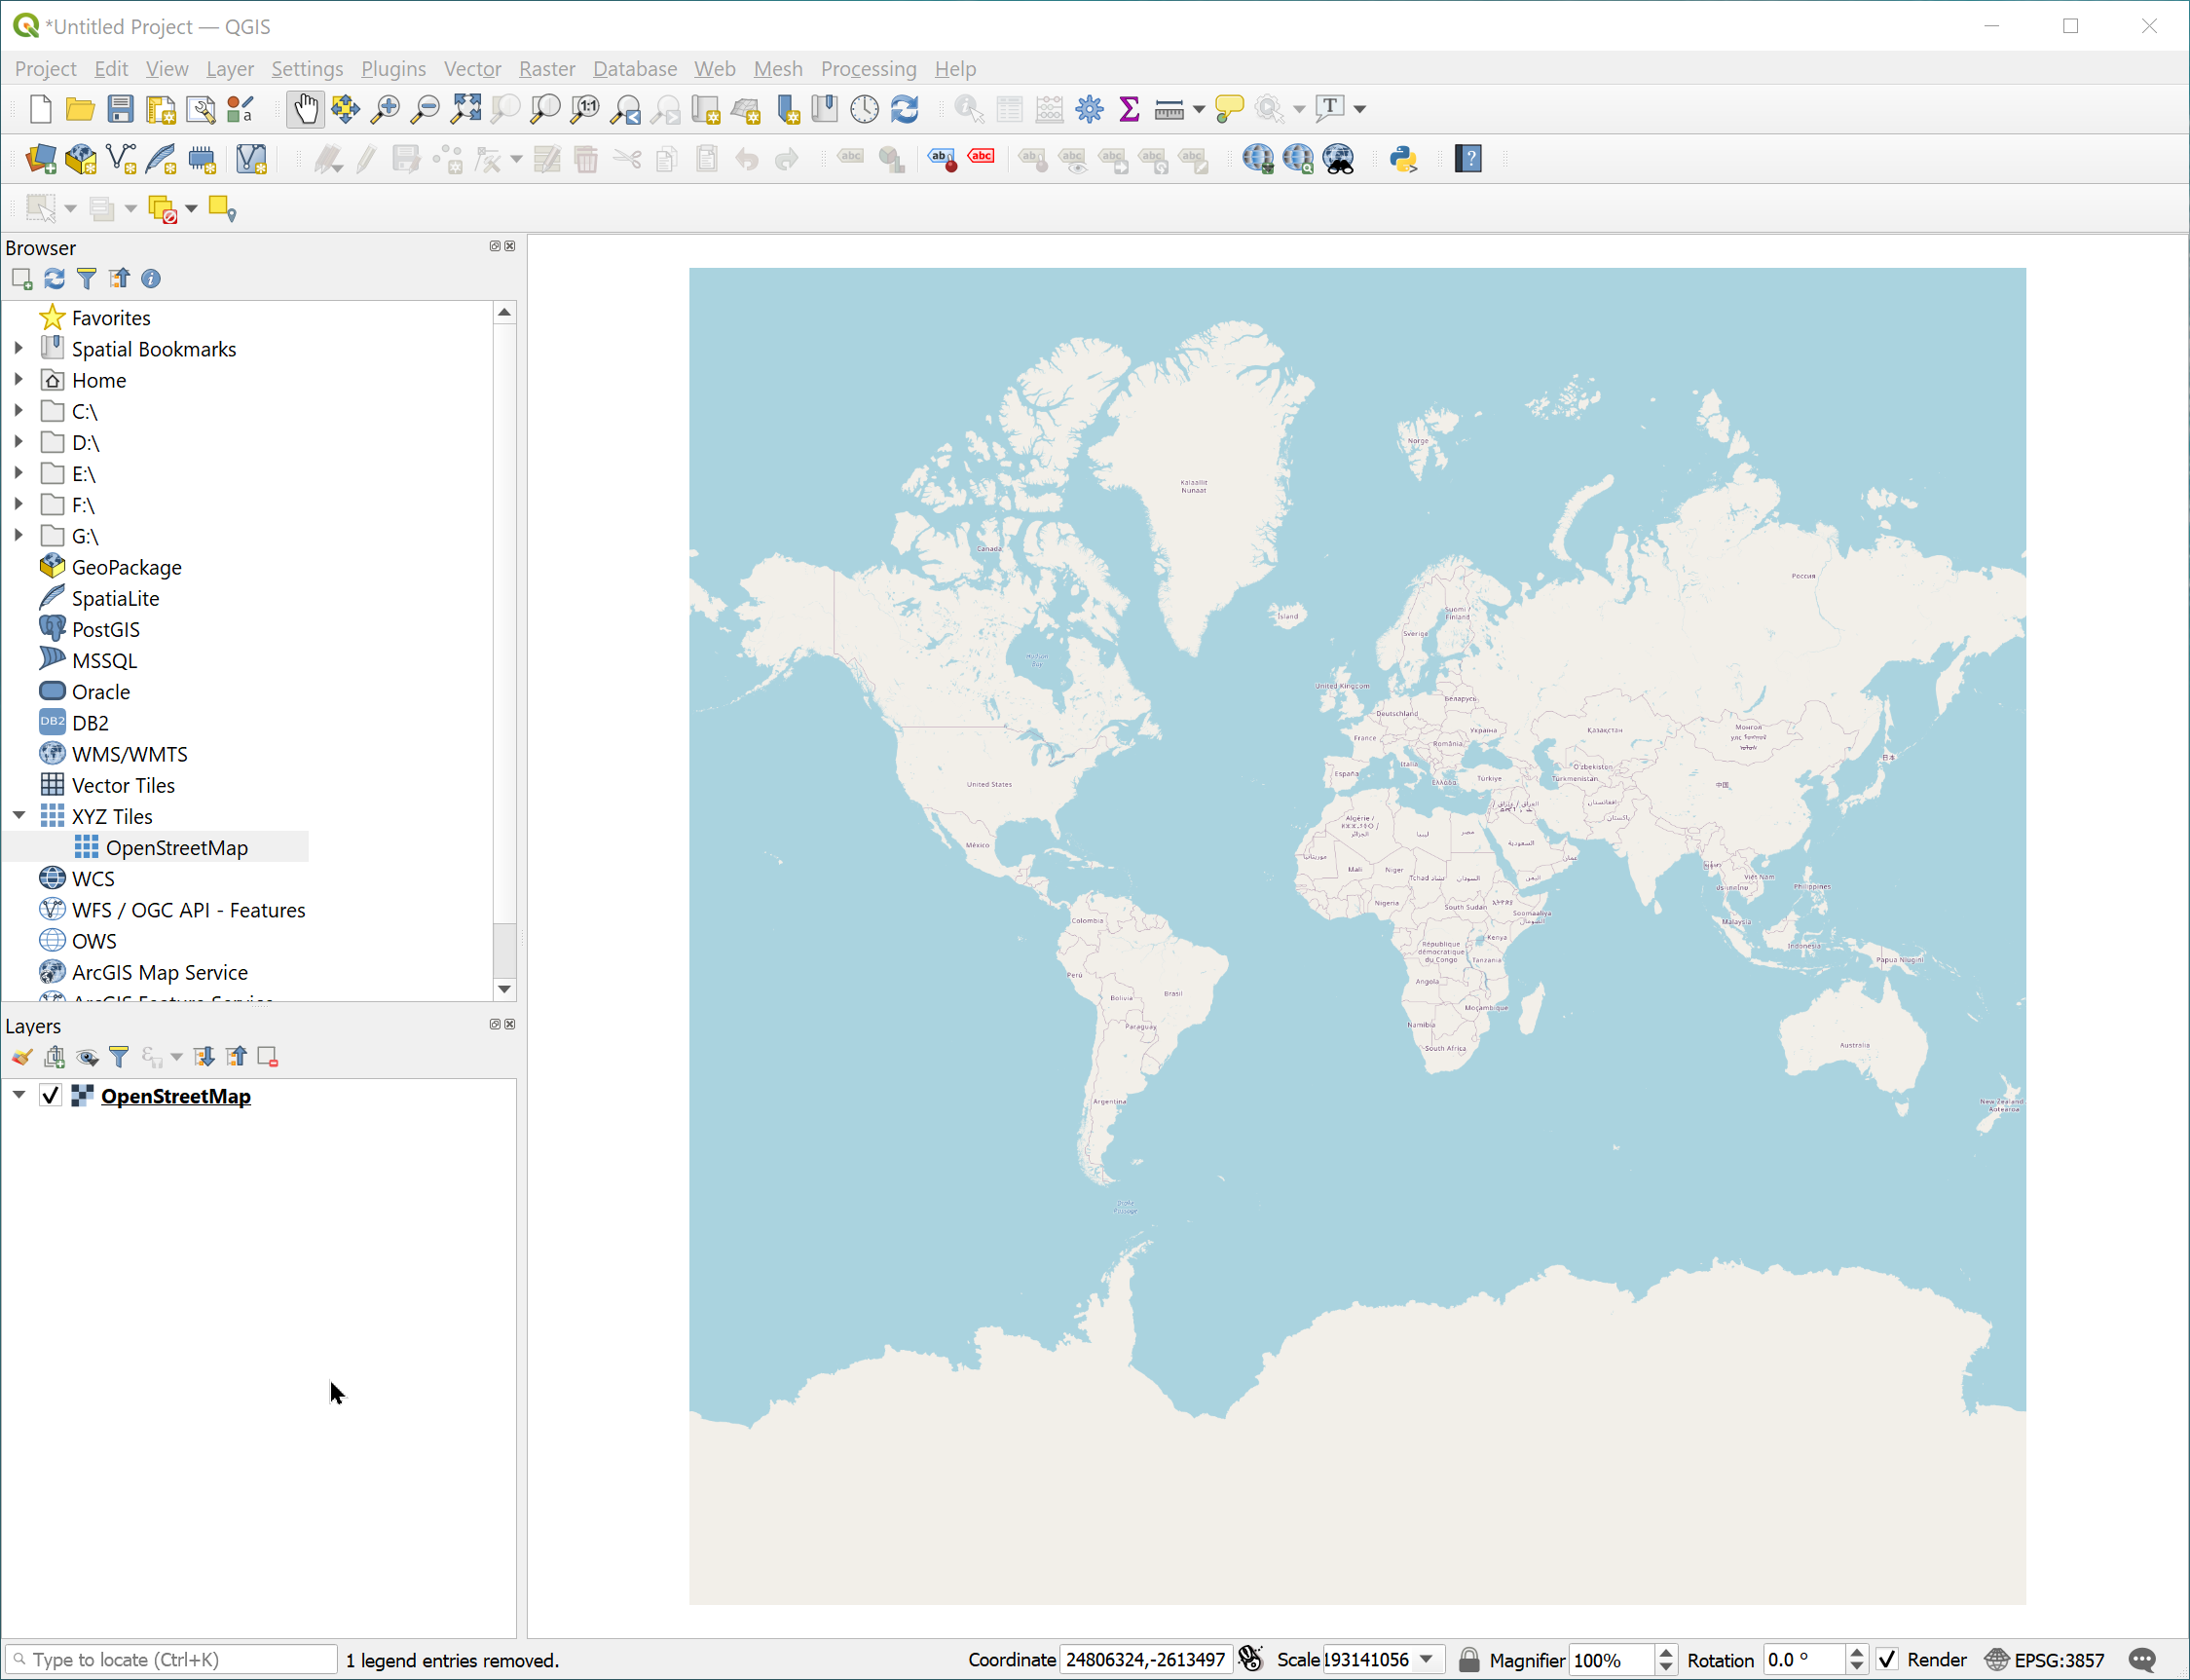
Go to the Layers tab from master toolbar, select Add Layer > Add XYZ Layer > Select OpenStreetMap > Add:
You can meet OSM added as a layer in the QGIS layers tab and seen in the map canvas area.
Import the CSV file as a bespeak vector
One time we add the base map, we need to import the store location data as a bespeak vector layer. The CSV file from ScrapeHero appears as shown when opened in Excel. Each record in the table has the fields Latitude and Longitude , based on which nosotros can plot the points on the map.
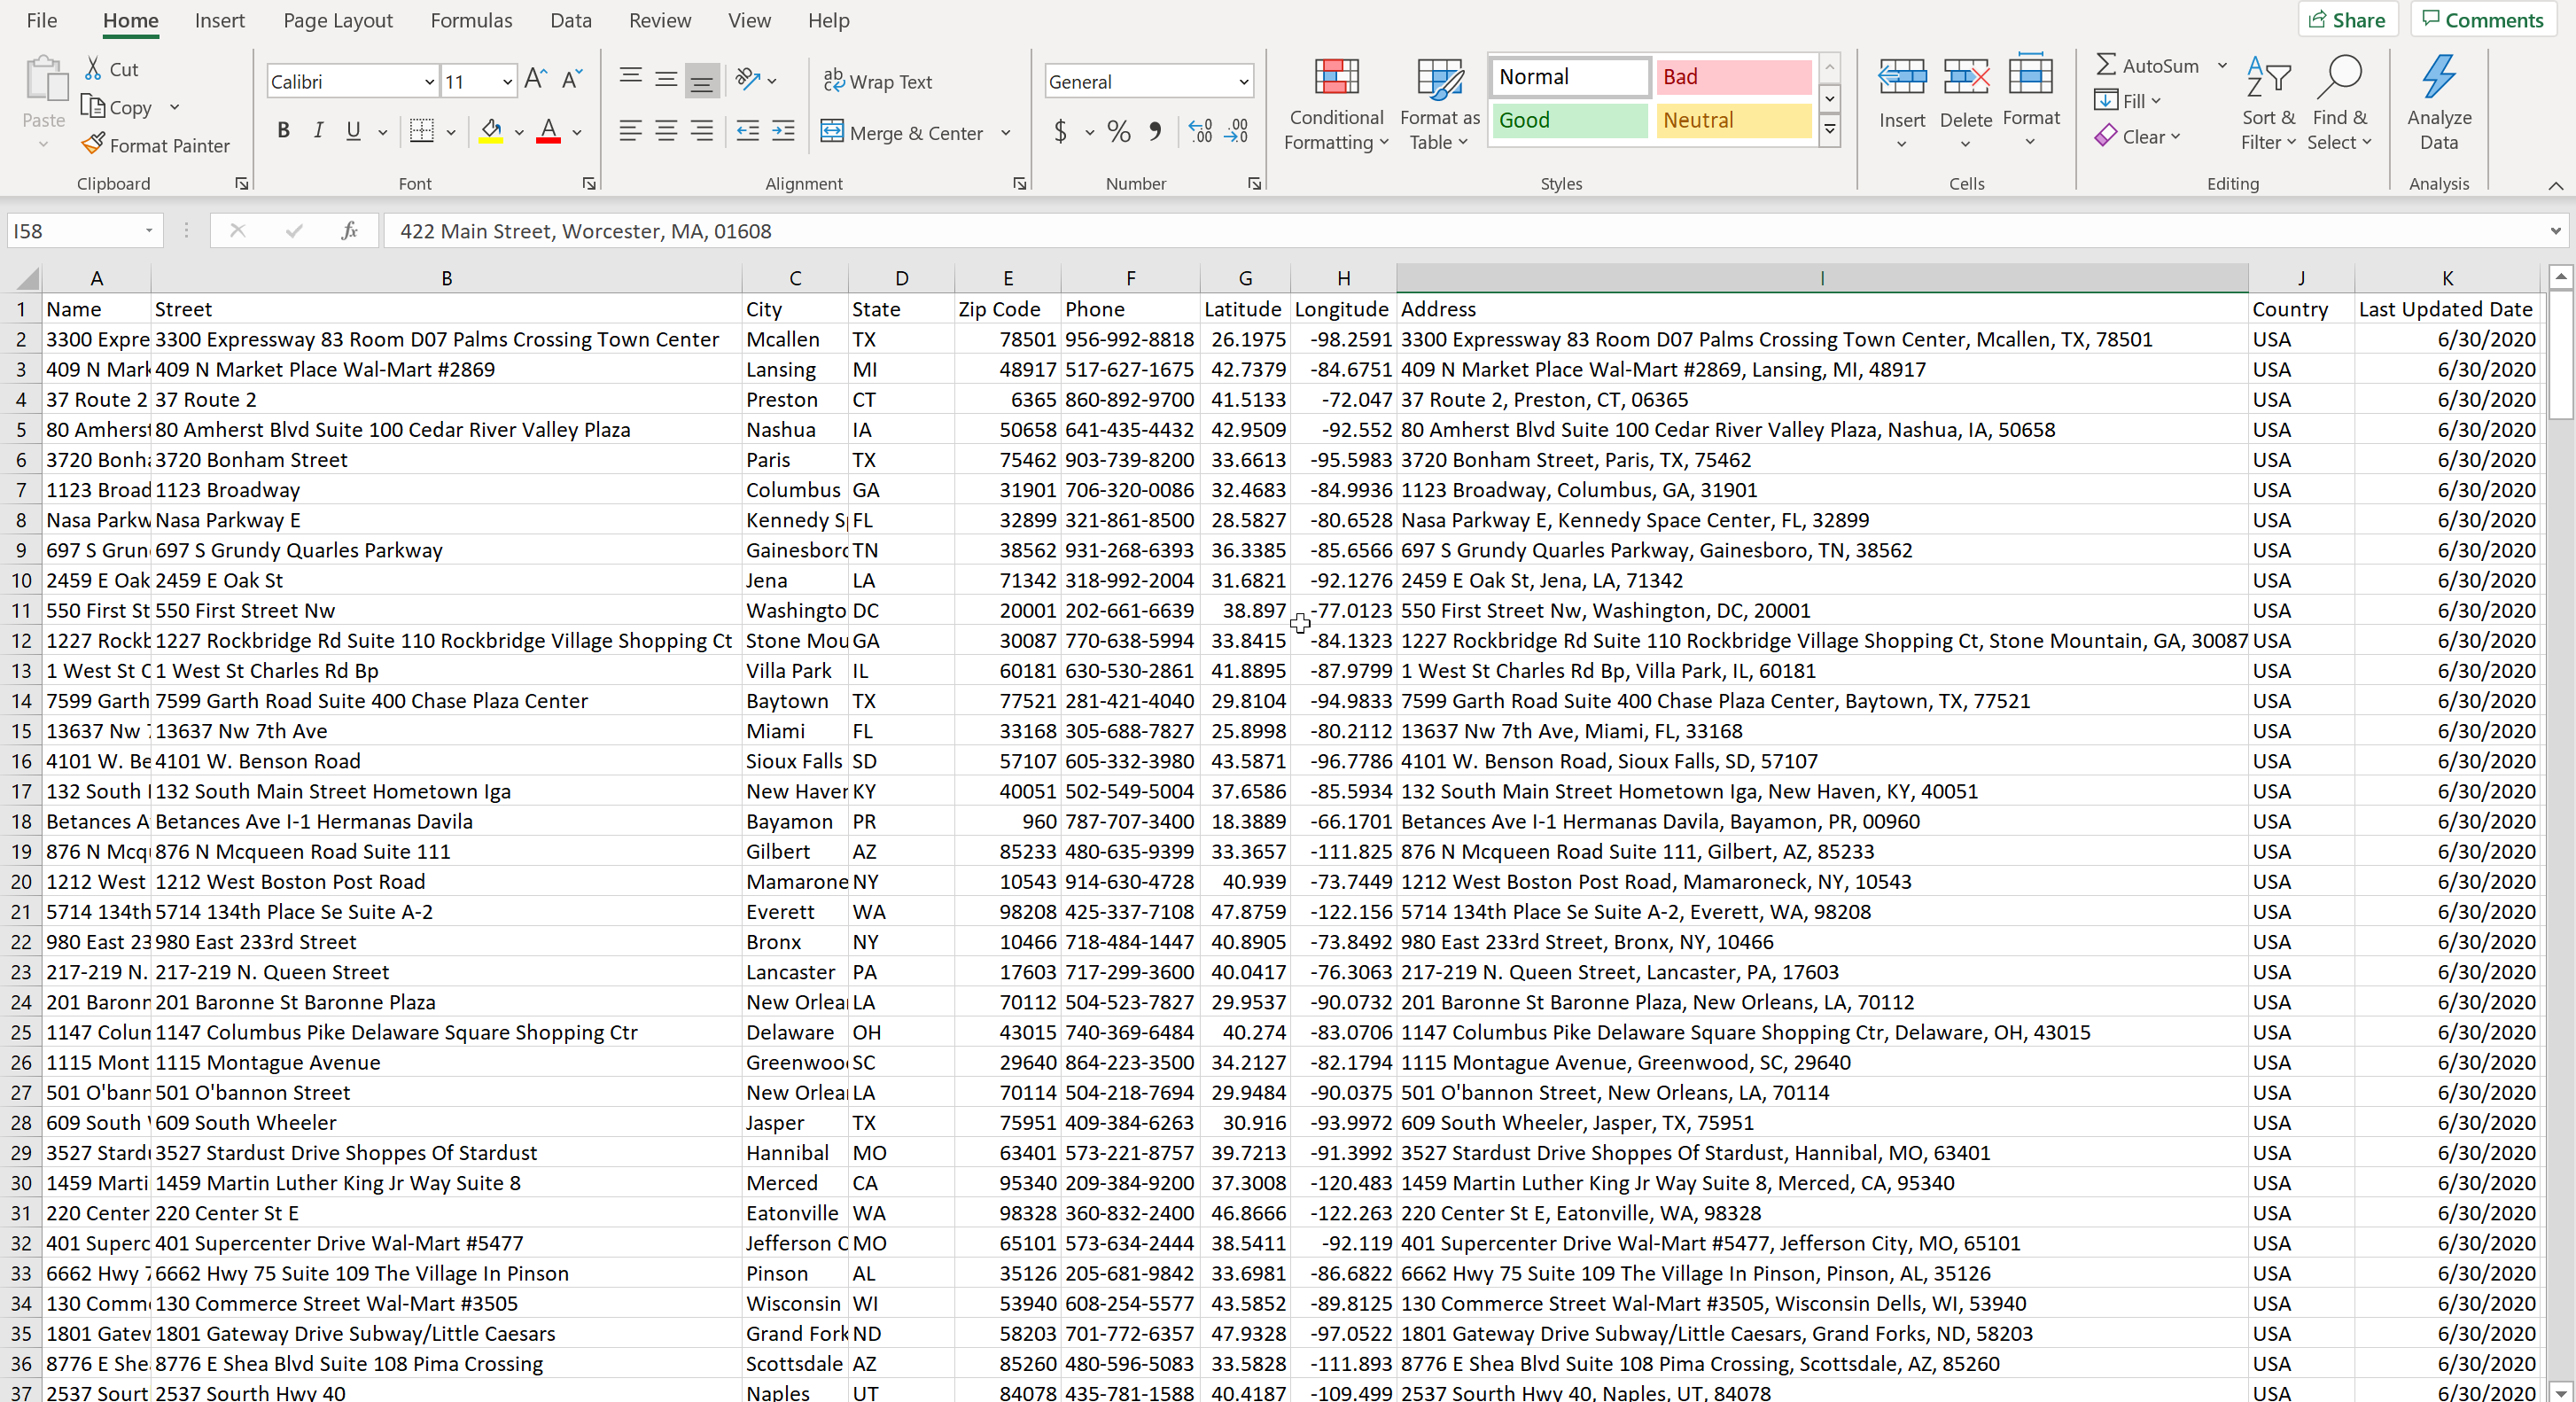
Breadth and Longitude fields are the coordinates, and each record in the table will get added as a point vector. We will add a new 'Delimited text layer' and assign Longitude every bit the X coordinate and Latitude as the Y coordinate
Get to the Layers tab from the master toolbar, select Add layer > Add Delimited Text Layer
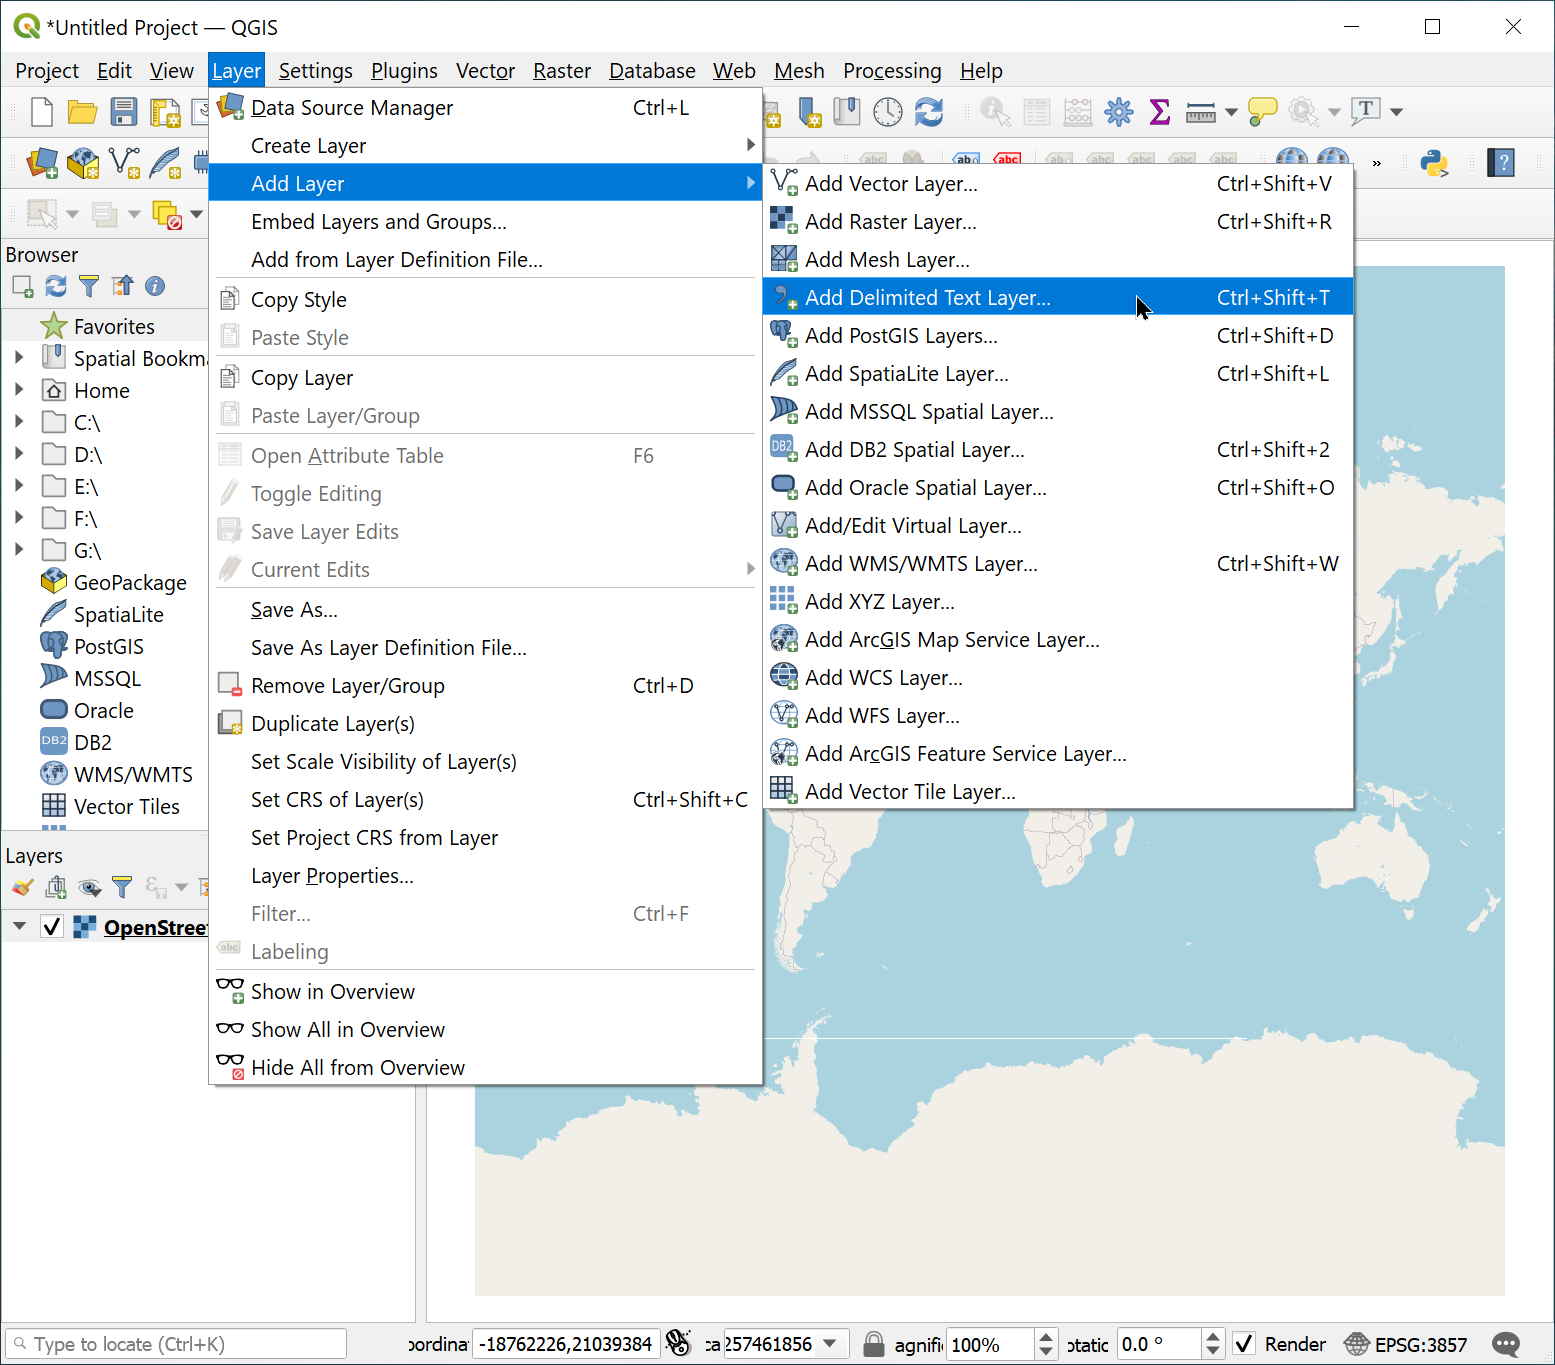
The 'Data Source Manager' window that pops upwardly, scan for the ScrapeHero CSV file equally File name. Select the Longitude and Latitude equally X field and Y field, respectively. Likewise, select the respective Geometry CRS (coordinate reference system) based on the expanse or country used. For The United States, EPSG 4326 – WGS 84 is generally used.

Clicking on the Add push should add many points every bit a layer of the Store Locations over the base map. Correct-click the point data layer and select the 'Zoom to Layer' choice, and then pan the image to view as required:
Edit symbology and label accordingly
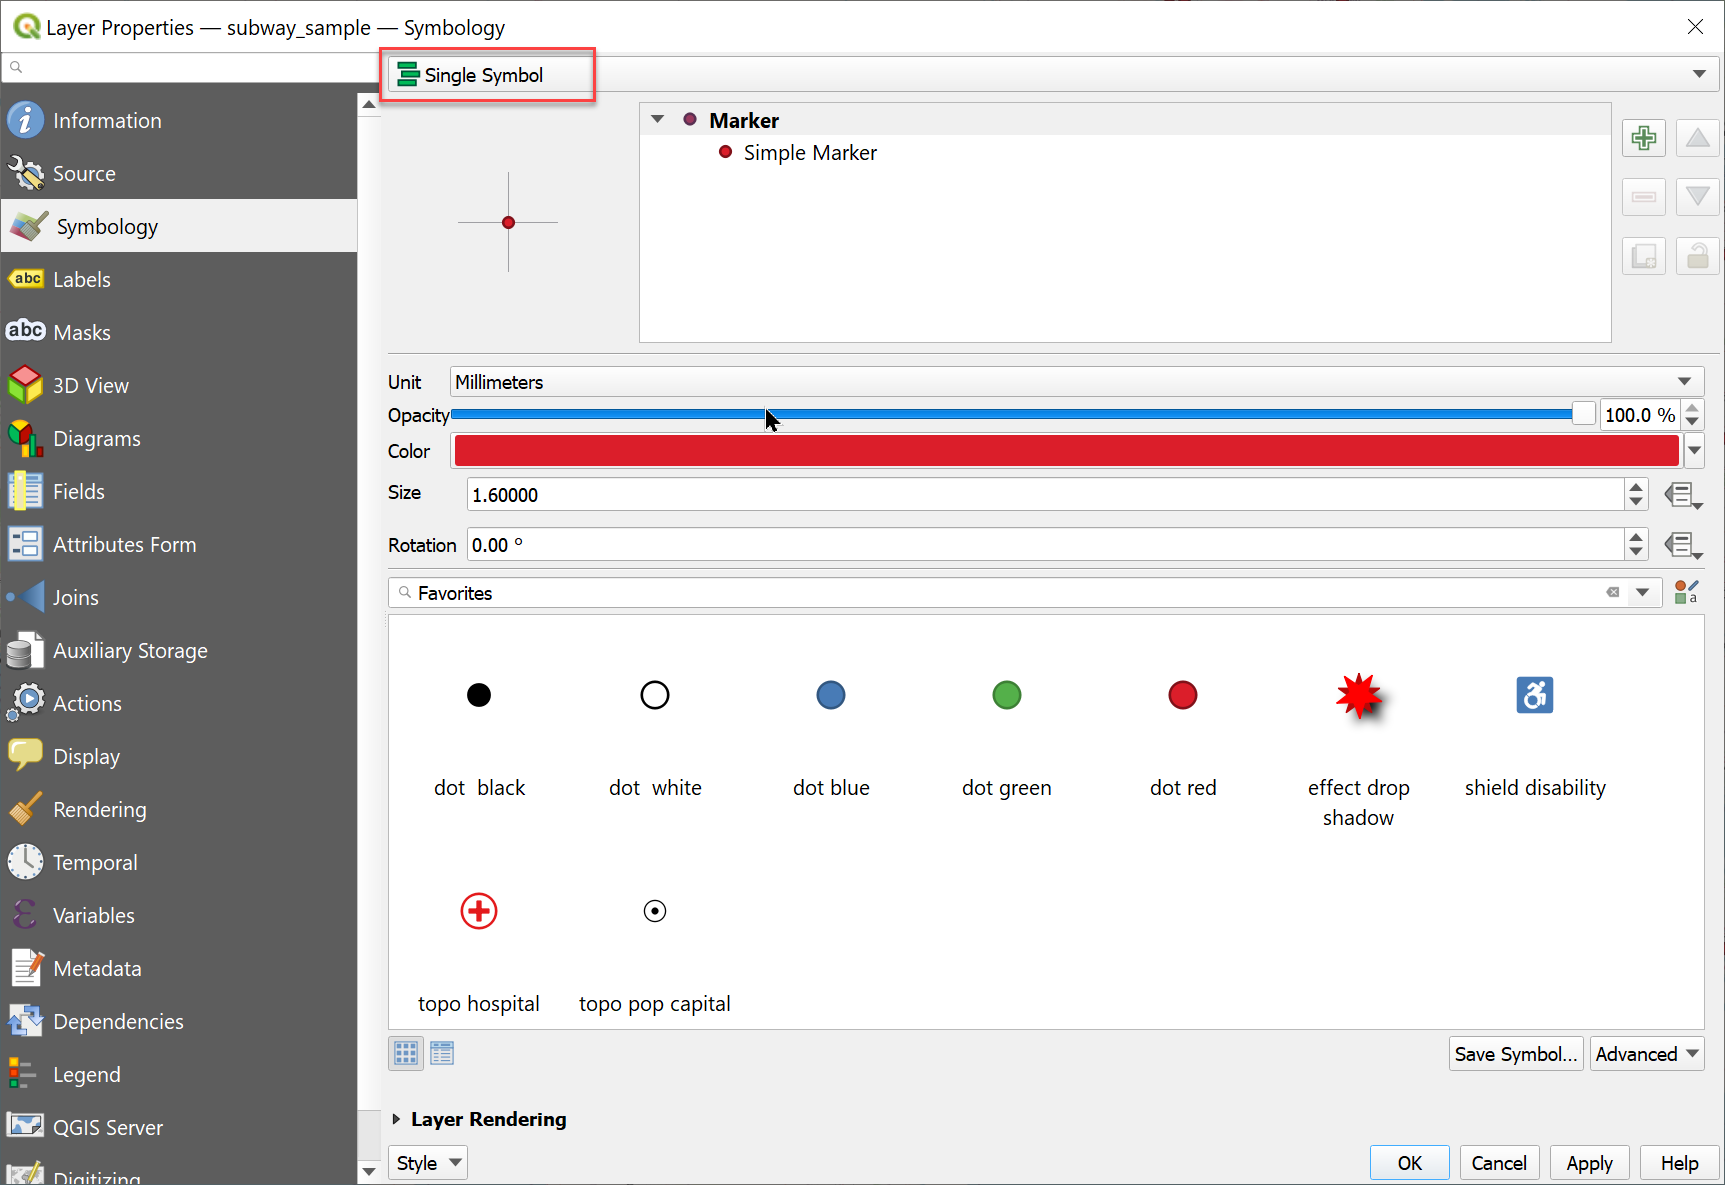
Side by side, let's edit the symbology of the point vector layer to brand the map more elegant. Symbology here ways the Size, Colors, Shape, etc., of the symbols used for each point.
Right-click the indicate data layer, select properties, and go to the Symbology tab.
From the symbology window, Select the 'Single Symbol' option. Edit the size, color, and type of symbol to be used as required.
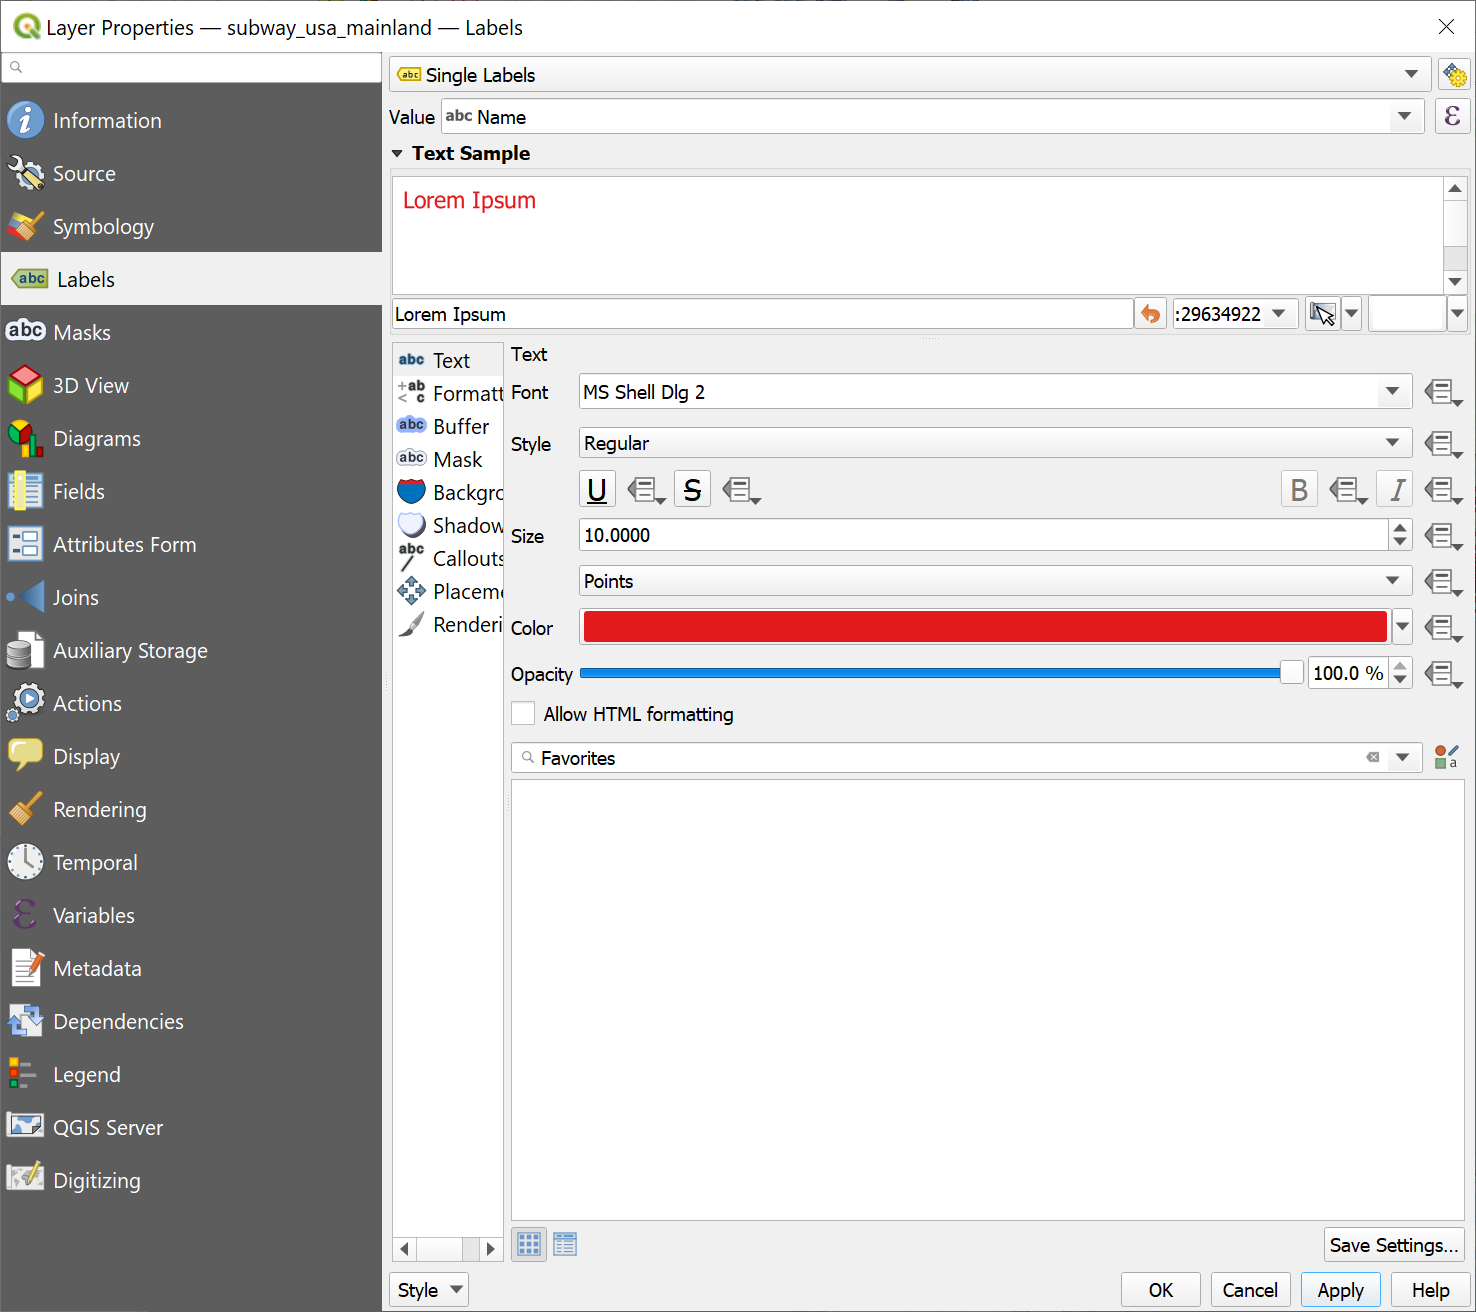
To give a label respective to each point data, right-click the point information layer, select backdrop, and go to the Characterization option. Here we tin select the field to be added every bit the label and edit other properties of the label added.
Select 'Single Labels' and so the 'Value' field from the tabular array every bit the label. Here, the 'name' of the shop is labeled corresponding to each location. Configure the font, font color, font size, opacity, and other attributes as yous like.
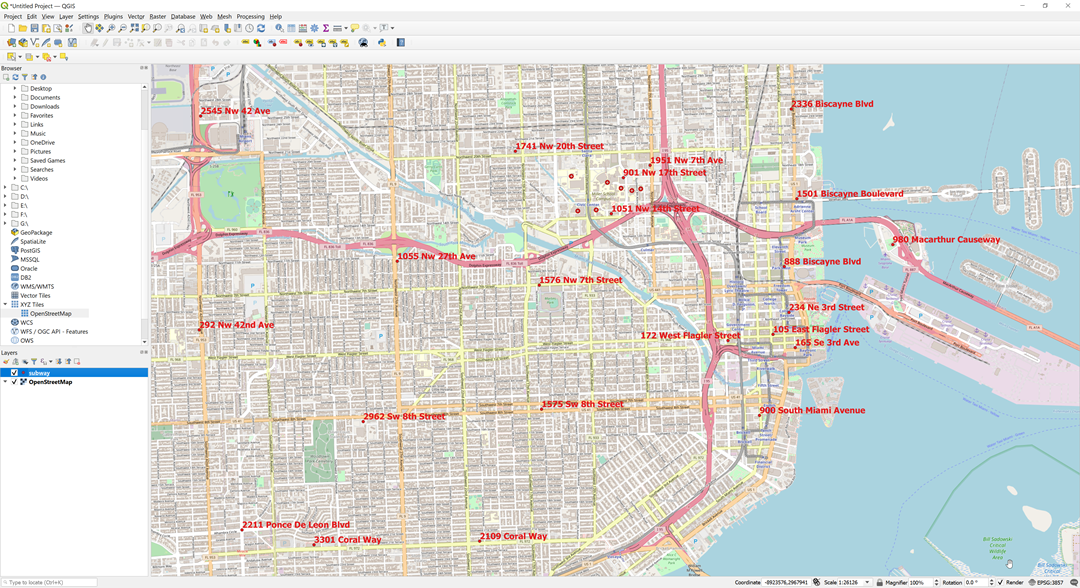
We should get the shop location map after editing symbology and labels somewhat similar to what we have below:
Export the map equally an Image or PDF
We can export the map viewed over the Prototype canvas area of QGIS as a PDF or an Image (png). In this tutorial, we are exporting only a part of the whole map. To export the entire map, yous can right-click the prototype layer and select the 'Zoom to Layer' choice. In that case, yous can plow off the labels for a better appearance.
For now, we volition consign only a basic map without calculation other map elements. Yous can add legends, scale, north arrows, and other map elements in QGIS if required.
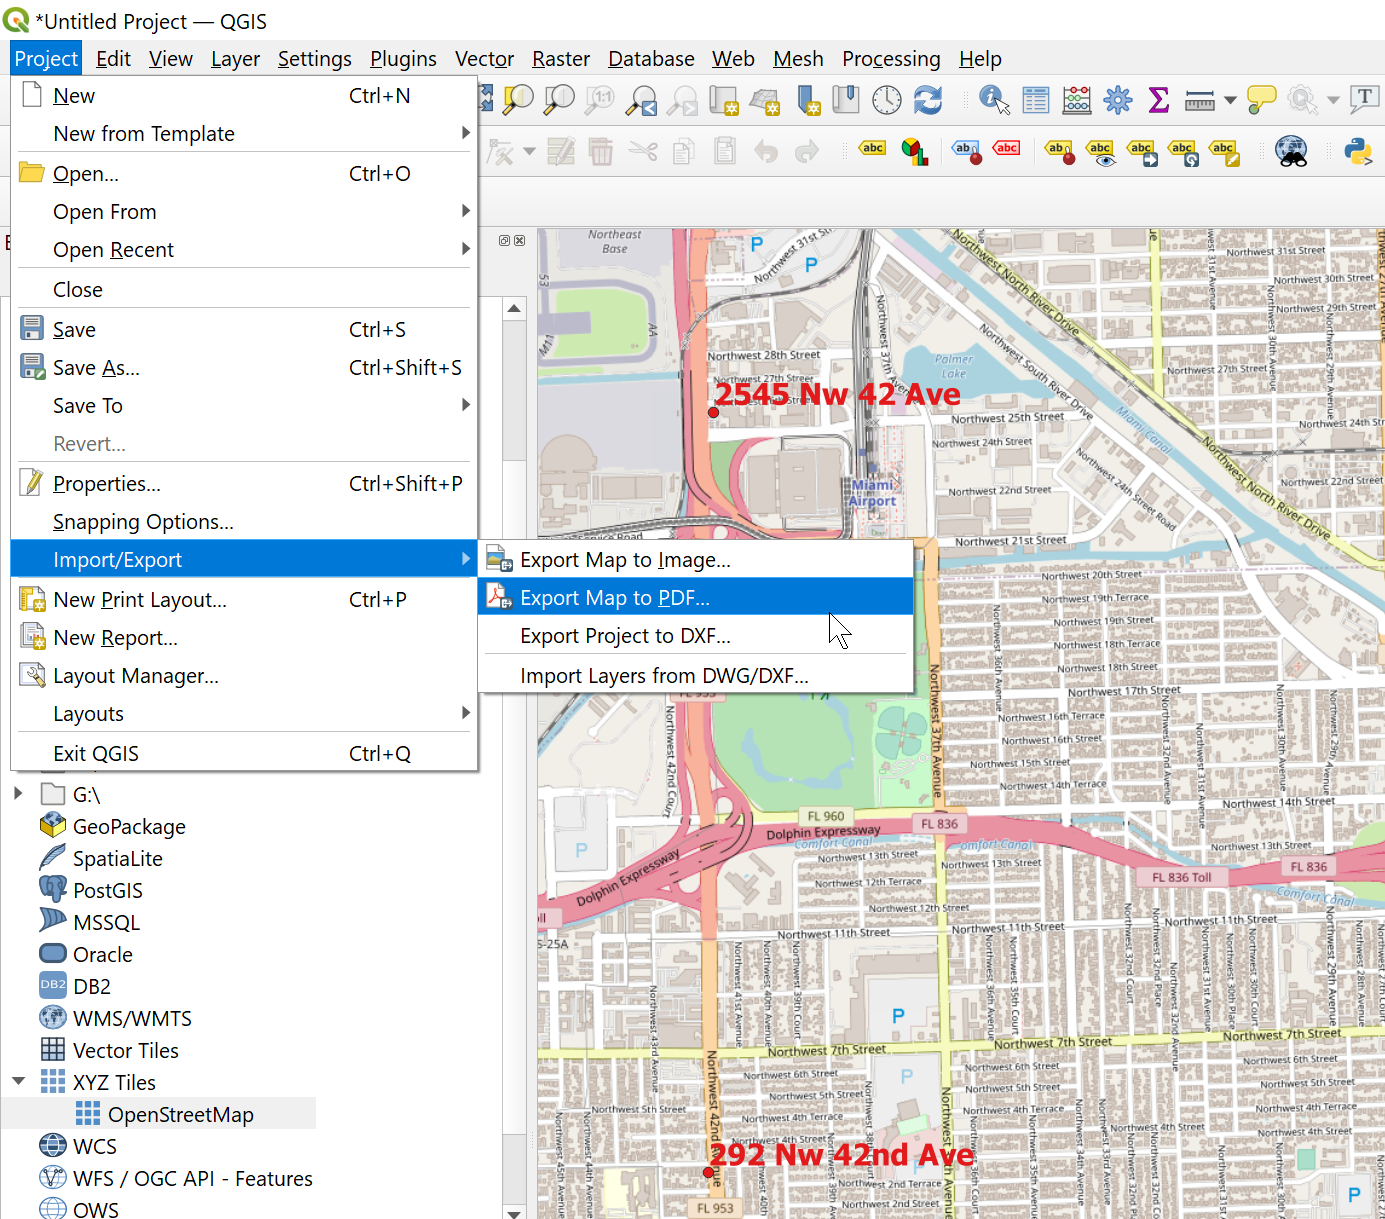
To consign in PDF or PNG formats, first, zoom and pan the image over the canvas.
Go to Project> Import/Export > Export as Prototype for png format or Export every bit PDF to go the final map in PDF format.
That'southward it!
Source: https://www.scrapehero.com/how-to-plot-location-data-from-a-csv-file-as-points-on-qgis/
Publicar un comentario for "How to Upload a Json File in Qgis"